The video above tells you what you need to know. But if you'd like to read it, the following is for you!
Getting Started
How do you get started using Timesheet Sidekick?
(1) Download and Install
Depending on your version of Windows, and your privacy settings, you might get a message such as the following when you try to install Timesheet Sidekick:
Windows protected your PC
Windows Defender SmartScreen prevented an unrecognized app from
starting. Running this app might put your PC at risk.
More info
[Don't run]
Clicking on the "More info" will show this:
App: TimesheetSikekickFreeSetup.exe
Publisher: Unknown publisher
[Run anyway] [Don't run]
If you trust me (I recommend that you do!) click on the [Run anyway] button.
Depending on your Windows User Account Control settings, you will then likely be asked
if you want to proceed.
Click [Yes].
The installer will do typical installer stuff, and let you launch Timesheet Sidekick when you're done.
(2) Launch Timesheet Sidekick
When you first launch Timesheet Sidekick, it should look something like this:
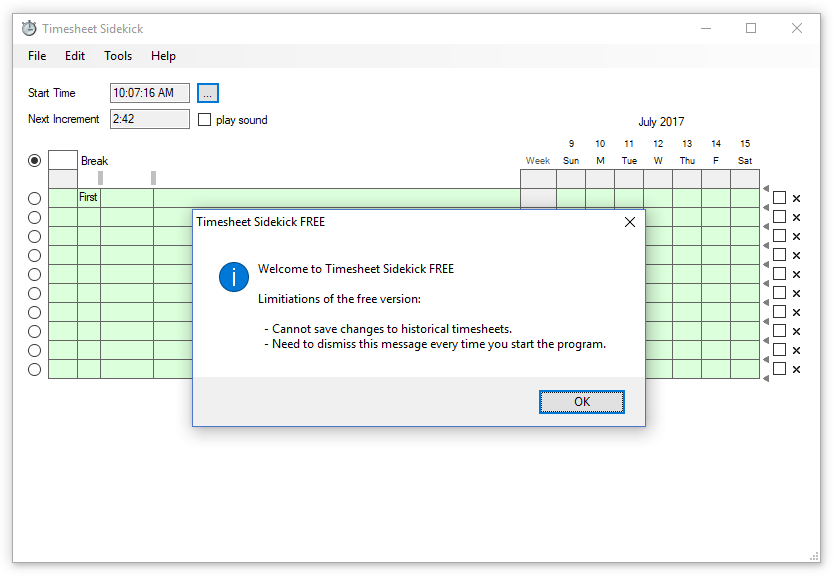
Click [OK]
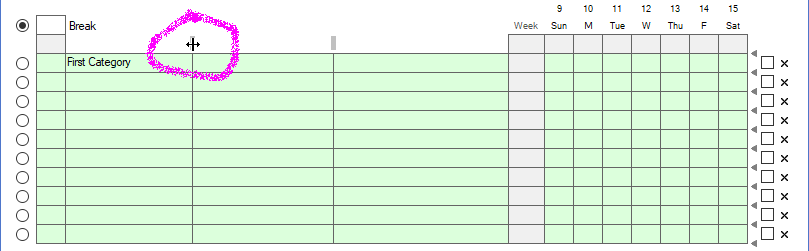
There are 3 columns in which you enter information about the tasks you work on. The first column is for the category of task (however you choose to define your categories), and the next 2 columns are for whatever information you want to enter. Above the divisions between the columns are controls for changing the widths of the columns. To resize a column, click-and-hold the resize control, drag it to the left or to the right, and then release the mouse button. Double-clicking on the resize control should size the column to fit the contents.
Resize the columns to make them each roughly the same size.
(3) Create Categories
To start with, we will create 3 categories:
- Admin
- Support
- Development
Click in the cell which contains the words "First Category". Delete those words and enter "Admin". Then press the Down-Arrow key on your keyboard 3 times, or click in the cell 3 below the "Admin" cell.
Now type in the word "Support" and press the Enter key on your keyboard.
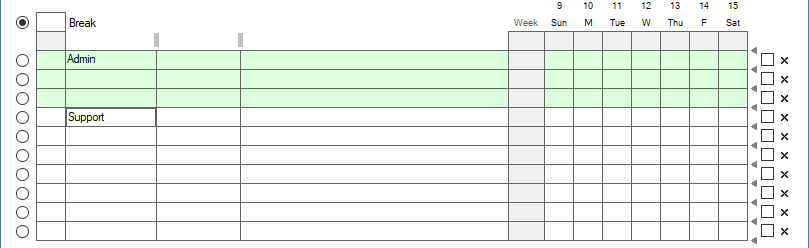
Note that the "Support" row, and all rows below it, have changed color from ledger green to white. Click the Down-arrow key twice, or click in the cell 2 below the "Support" cell. Now type the word "Development" and press Enter.
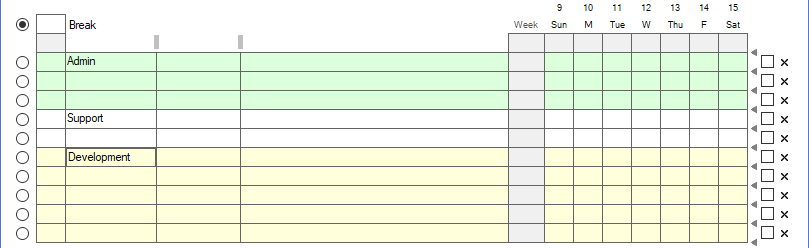
Note that the "Development" row, and all rows below it, have changed color from white to yellow.
(4) Insert New Rows
Now we've decided that we'd like 2 more rows in the "Support" group of tasks. At the right-hand side of the window are 3 controls:
- insert new row (arrow icon)
- select row (check box)
- delete row ('x' icon)
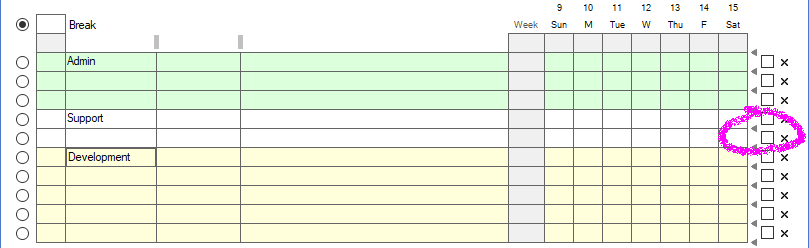
Clicking twice on an "insert new row" arrow in the "Support" section will add 2 new Support rows.
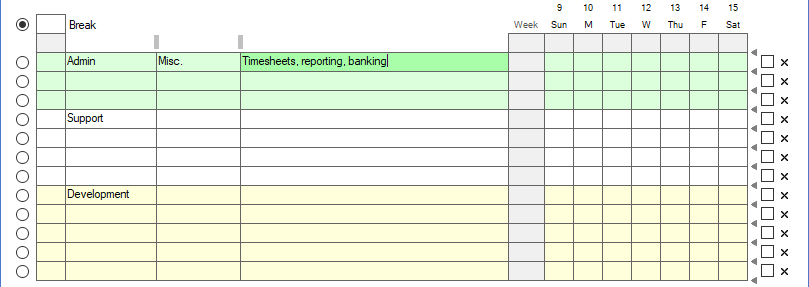
(5) Add Task Details
Now let's start adding task details, starting with an "Admin" task.
(6) Select the Task You are Working On
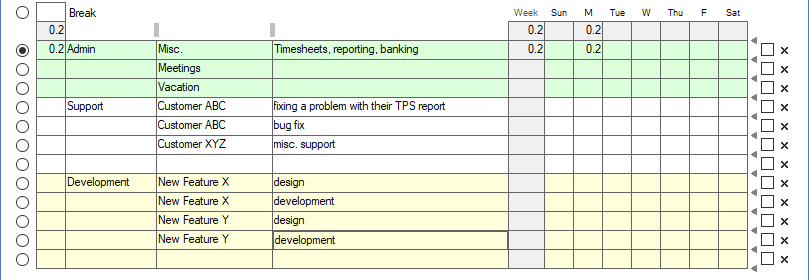
Now that we have a task for "Admin/Misc./Timesheets, reporting, banking", since we are spending time setting up our timesheet, let's select that task. At the left-hand side of the window are a series of "radio buttons". Select the one beside the "Admin/Misc./Timesheets, reporting, banking" task.
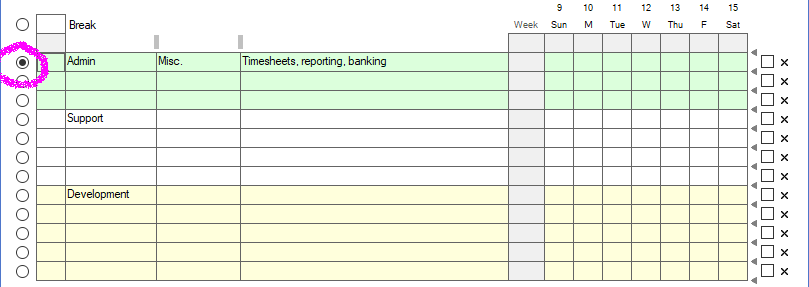
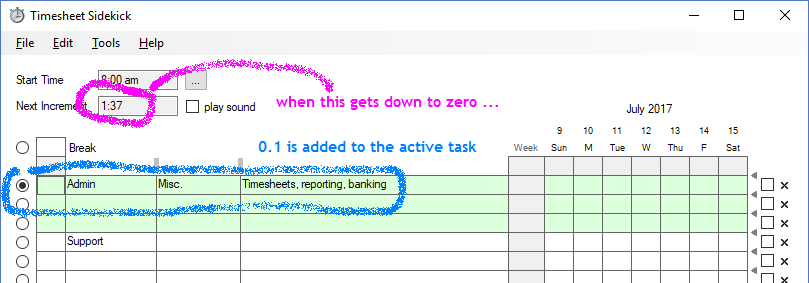
Now that you've selected a task other than the "Break" task, every 6 minutes (1/10 of an hour), the accumulated time column for the task will be incremented by 0.1 hours.
(7) Add More Task Details
Now we're ready to add more task details. Note below that by the time we are done, 0.2 hours have elapsed.
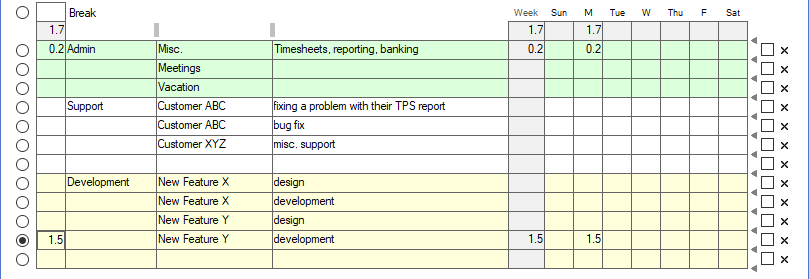
(8) Stop Using Timesheet Sidekick, and Do Some Regular Work!
Having done all this, we're going to work on the "New Feature Y" task. So we'll select the radio button for that task. An hour and a half later, we see that there are 1.5 hours assigned to the "New Feature Y" task.
At the end of a week, we can see that we've put in a full 40 hours.
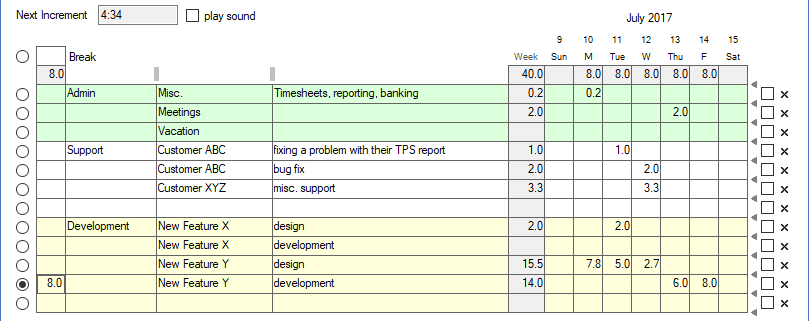
At the start of the next week, all the tasks we set up for this week will be automatically carried forward, appearing on your new timesheet the first time you launch Timesheet Sidekick in the new week.
| Timesheet Sidekick's Channel at YouTube |  |
| Timesheet Sidekick at facebook |  |